March 29, 2022
Our Guest Maker series continues with a hack tutorial from Bri of @BriMichelleMade. She made TWO versions of the Ella Skirt - each with a stretchy twist and is here to tell you how to make your own Elasticated Ella Skirt!

I’ve had my eye on the Ella Skirt sewing pattern ever since it was released. I love that it’s a gathered skirt with just a little bit extra. The balanced A-line shape, the subtle high-low hem and of course that sweet ruffle tier come together to make up the perfect skirt.
One little thing held me back though. The zip. While I’m confident in sewing an invisible zip, I pretty much avoid wearing them. Between working from home, chasing after a kiddo and managing a chronic illness, my life and my clothing require a bit more flexibility.

Now I tried a few elastic waist skirt patterns over the years and was always left a bit disappointed. So finally, I came back to the Ella Skirt and decided to hack the waistband to be more suitable and sustainable for my life and my body. Now I have two lovely skirts that are both beautiful and comfortable to wear!

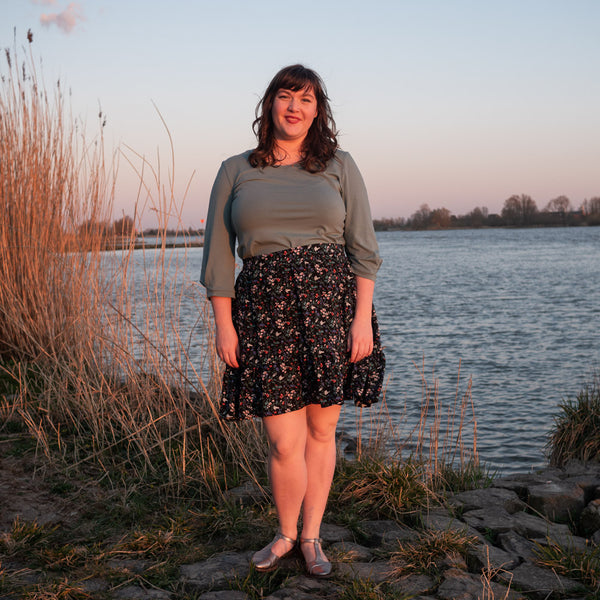
I couldn’t decide if I wanted just an easy breezy fully elasticates skirt or a business in the front party in the back half-elasticated skirt. So I made both! I couldn’t be happier!


I know I’ll be twirling in my blue knee length prairie chic floral fully elasticated skirt all through the spring and summer. I love how it pairs so sweetly with my cream Vera Top. For my half-elasticated Ella, I went for the shorter length and used a dark floral so I could layer it up with tights and boots in the colder months. I love how there are so many colors in the print to match with. I've paired it with my favorite green Iris Pleated Tee and I love the combination!
I love them both so much, but if I had to pick a favorite, I’d have to pick the dark, short Ella. The colors in the print remind me of the garden in Alice in Wonderland and I’m so proud of the pretty flat front waistband!

Since I loved my elasticated Ellas so much, I wanted to share a bit how I made them and how you can turn any gathered skirt into one with an elastic waist. I’ll start with the fully elasticated waist since it’s a little more straight forward, and then walk you through how to achieve the flat-front elastic-back.
You’ll need the following supplies:

To begin, we need to make new waistband pattern pieces. Our new waistband needs to be long enough to pull over the hips and wide enough to act as a channel for the elastic to be fed through. To find these dimensions you’ll need your skirt pattern piece to determine the length and your elastic to determine the width.
The length is easy. Simply measure the very top edge of your skirt piece. Take care to account for any curves.

For the width, start with the width of your elastic then add seam allowance and 0.5-0.75cm (⅛-½”) wiggle room for the elastic. For me, my elastic was 3cm (1 ¼), my seam allowance 1cm (⅜”) and I added 0.75 (¼”) extra so my sum was 4.75cm (1 ⅞”). Next double your sum because we’re going to fold the piece in half to create the waistband. My waistband width was 9.5cm (3 ¾”).


To find the length of the elastic, I like to use the waist measurement minus 5cm (2”) rule and then adjust from there. Elastic can vary so much, so it’s important to test out how it feels once it’s in the waistband.
Cut out the new waistband pieces along with the rest of the skirt body pieces. Since we’re using a thick waistband elastic, there’s no need to interface the waistband. Sew the skirt body according to the pattern instructions.
It’s not necessary to finish the edges since all the raw edges will be enclosed. I chose to overlock my waistband pieces so they’d be easier to handle since I was using a viscose that frayed quite a bit.
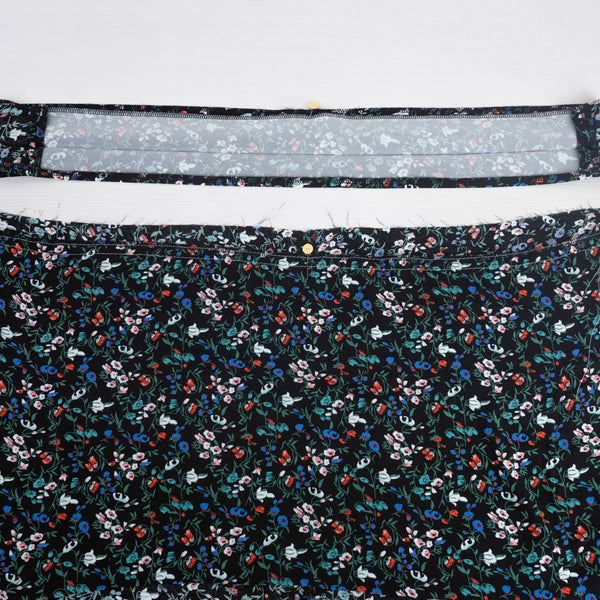
I always find it helpful to prepress my waistband pieces while they’re flat instead of trying to measure and press after it’s attached to the skirt. First press the waistband pieces in half lengthwise. Then turn one edge under by 1cm (⅜”).

Next sew the two back pieces together and press open. Then stitch the front and back waistbands together. Press seams open.
Matching the side and center back seams, pin the flat edges of the waistband to the skirt body right sides together. Stitch using a 1cm (⅜”) seam allowance.


Press the seam open and then up towards the waistband. I find it really helpful to topstitch the seam allowance to the waistband. It’s not necessary, but it helps keep everything out of the way when inserting the elastic.

Fold the waistband down to the inside of the skirt. Bring the folded edge just past the stitching line and pin from the outside. Working from the outside of the skirt, stitch in the ditch between the skirt and waistband being careful to catch the inside waistband. Leave a 5cm (2”) gap to thread the elastic through.

Using a safety pin or bodkin, thread the elastic through the channel you’ve just created. It’s helpful to pin the end of the elastic to the garment to keep it from slipping into the channel while you’re threading the other end through. Make sure that there aren’t any twists or kinks before overlapping the elastic by 2.5cm (1”) and stitching closed.

Turning your skirt back to the outside, close the gap by stitching in the ditch. Pull the waistband all the way to distribute the elastic and gathers. Vertically stitch in the ditch at the waistband side seams to keep the elastic from twisting in the future.
Hem up your skirt and give a twirl!


For my second Elasticated Ella, I opted for a flat front waistband with an elastic back. I really love this style. It’s still super comfortable but looks a bit more elevated.
Again we’ll start by making the waistband pattern pieces. For the front, measure the front part of your waist. I found it helpful to wear a close-fitting tee and measure side seam to side seam. Divide this measurement in half and add 1cm (⅜”) seam allowance.
For the width, start with the width of your elastic then add seam allowance and 0.5-0.75cm (⅛-½”) wiggle room for the elastic. For me, my elastic was 3cm, my seam allowance 1cm (⅜”) and I added 0.75 (¼”) extra so my sum was 4.75cm (1 ⅞”). Next double your sum because we’re going to fold the piece in half lengthwise to create the waistband. My waistband width was 9.5cm (3 ¾”).
The front waistband will get interfaced, but not the back waistband.

The back waistband length is just measuring the top of the skirt pattern piece. Just make sure you account for the curve by either pivoting your measuring tape or using something more flexible like string to follow the curve.

After cutting pattern pieces, interface your front waistband piece. Then press your waistband pieces in half lengthwise and then press one side up by 1cm (⅜”).
It’s not necessary to finish the edges since all the raw edges will be enclosed. I chose to overlock my waistband pieces so they’d be easier to work with since my viscose was very prone to fraying. I also used a thin strip of interfacing near the edges to strengthen the seam - it’s not necessary, but can provide more stability to drapey fabrics.

Stitch the center back waistband together and then the back waistband to the front waistband. Press seams open and repress edge and center folds.

Assemble the skirt body as instructed. Sew two rows of gathering stitches on the front skirt only. Mark the center front of the skirt and waistband.

With right sides together, pin the waistband to the back of the skirt, matching the center back and side seams. With the back waistband pinned in place, gently pull on the gathering threads until the top of the skirt matches the length of the waistband. Distribute gatherers evenly. Pin and stitch.

Press the seam allowance open and then up towards the waistband. Fold the waistband to the inside of the skirt. Bring the folded edge of the waistband just past the stitch line. Pin in place from the outside.

Working from the outside, carefully stitch in the ditch between the skirt and waistband, catching the inside of the waistband. Leave two 5cm (2”) gaps on the front skirt just past the side seams. This is where you’ll thread the elastic through and secure it.
To find the length of elastic you’ll need, measure your back waist approximately side seam to seam. Then subtract 5cm (2”). Ultimately, every elastic behaves differently, so you’ll want to try it first and make adjustments.

Use a safety pin or bodkin to thread your elastic through the two gaps. Pin and baste the elastic by stitching in the ditch of the waistband side seam. This is the time to try on the skirt and make sure the elastic fits well. I’d even recommend wearing it around for a little while to see how the elastic stretches and recovers.

Once the elastic is at the right length, stitch the side seam waistband ditches and close the gaps by stitching in the ditch between the waistband and the skirt.

The last step is optional, but I find it really elevates the finish. And that is to stretch the elastic and sew two or more rows of topstitching around the elastic. This helps to organize the gathers and maintain a closer fit across the back. I found this the trickiest part of the whole process, so definitely take your time here.

Attach your ruffle if you’re making the Ella skirt. Give it a hem and you’re done!

If you need a bit more flexibility in your life, I hope you’ll give this Ella elastic hack a try. Or try it on any other gathered skirt pattern. I’m so glad I finally did. The Ella pattern has such a beautiful shape and the proportions are just right for my body. And now the waist is just right too! Thanks so much for reading and happy sewing!
Bri (she/they) is a disabled, queer maker and the content coordinator here at Forget-me-not Patterns. She can be found on Instagram and YouTube at @BriMichelleMade.
November 05, 2025 0 Comments
It wouldn’t be a Forget-me-not celebration without showcasing the amazing makers who brought our designs to life. Today, we’ll share more about who really made it all possible - you!
October 31, 2025 0 Comments
Fancy a stroll down memory lane? Forget-me-not is saying farewell (at least, for now), but before we go, it’s time to celebrate where we’ve been!
Forget-me-not Patterns launched July 3, 2019 with the Clementine Knit Dress pattern. It was clear from the beginning that the sewing community was eager for distinctly detailed patterns with lots of options for styling and fit. We set out to design wearable wardrobe staples with extra special details to create pieces that were both elevated and easy to wear.
October 22, 2025 0 Comments
Dear Sewists,
With a grateful, yet heavy heart, Forget-me-not Patterns is saying farewell. At least for now. Design and patternmaking mean absolutely everything to me, and this decision hasn’t been an easy one.
