February 23, 2024
Sometimes a pattern and a fabric come together and it is absolute magic! I paired the Helmi Blouse sewing pattern with a classic Liberty cotton lawn. I made a couple little changes to personalise the pattern, and I am so in love with the result. So in love, in fact, I thought I’d take you along my sewing journey of how I stitched my favourite blouse to date. Read on to learn more about the pattern, how I made a short puff sleeve, and what I learned along the way!

I can confidently say that the Forget-me-not Helmi Blouse is one of my top favourite sewing patterns. When I made my first one last year, I was so impressed with the fit that I knew it would become my go-to blouse pattern. This is my third version (and a fourth is coming soon!) and I decided to change it up by shortening the sleeve and adding a bit of gathering to the shoulder for a bit of fun volume.
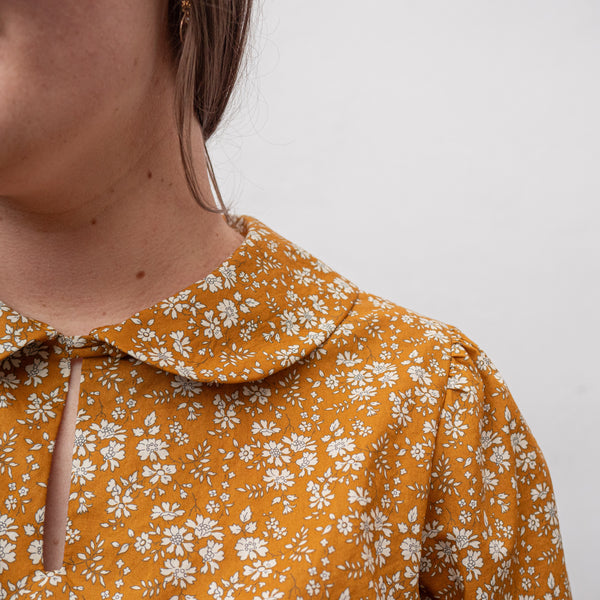
I fell in love with Helmi the first time I saw the style lines. Particularly the version with the Peter Pan collar. It’s amazing to me how something as simple as a collar can define a garment. To me the Peter Pan collar is dressy, but playful and romantic without being too frilly. It nods to vintage styles, while feeling very modern and cool at the same time. The Helmi pretty much sums up my style goals in one blouse!

On the practical side, the fit is impeccable. I still made my standard narrow and sloping shoulder adjustments that I make on almost every pattern, but I love not having to do a full bust adjustment. Thank you bust cup options! There’s almost no puckering at the dart tip (my sewing nemesis) and there’s no extra pooling around the underarm. Beyond fit, the pattern instructions are so thorough and thoughtful. The construction is really satisfying and the blouse comes together so smoothly. I love that there are options to use french seams, or not, and extra help for working with sheer or slippery fabrics.
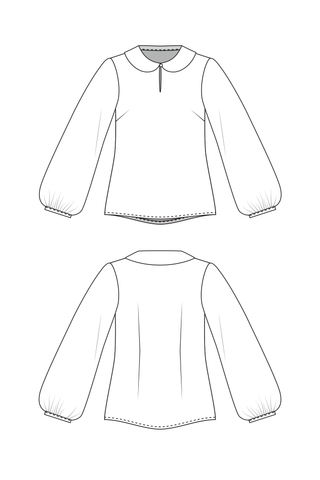
Speaking of fabrics, I sprung for a Liberty Tana Lawn for this project. I’d been eyeing this fabric for ages, but it seemed like a big investment. I was waiting on the right project before jumping in, and this Helmi blouse was the perfect choice. The print feels very “me.” I like the juxtaposition of the soft floral on the earthy ochre background. It feels whimsical, but also grounded.
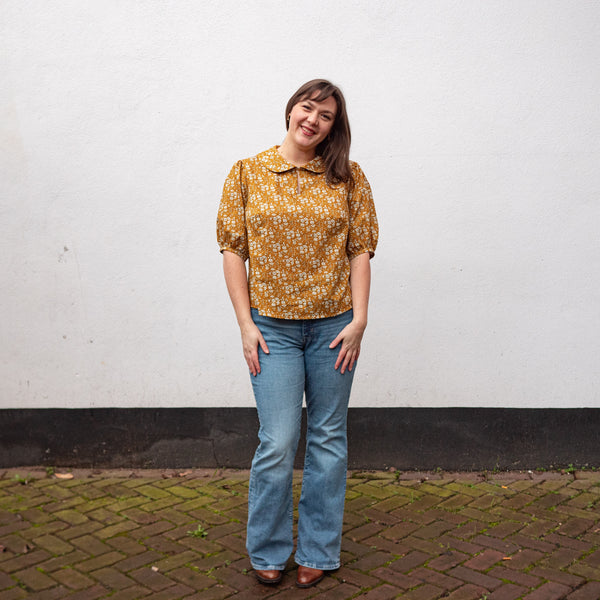
Having never worked with Liberty fabrics before, I can now say, the hype is real. Cotton lawn has the magical ability to drape beautifully, and still hold a bit of crisp volume. It’s lightweight and silky - I love the way it feels on my skin. And it was a breeze to sew with!
With the pattern and fabrics settled, I knew I wanted to personalise this version of the Helmi blouse. I chose to shorten the sleeve and add a little poof at the shoulder. The additional gathering at the shoulder was purely for visual interest, but opting for a short sleeve was a both functional and stylistic choice.
Based on how much I love both the pattern and the fabric, I knew I’d want to sew something that I could wear through all seasons. With the shorter sleeve, I can layer it up under chunky cardigans or jumpers with jeans and pinafores for colder weather. In the warmer months, I’m excited to wear it with my favourite denim Natalie skirt, as well as casual shorts and sandals.
The busy print was the other factor that influenced me to shorten the sleeve. I felt like the deep ochre and the concentrated floral print might come off a bit strong in a full length sleeve. I love the balance of the final garment. It feels bold, but also sweet and romantic, soft and down to earth.
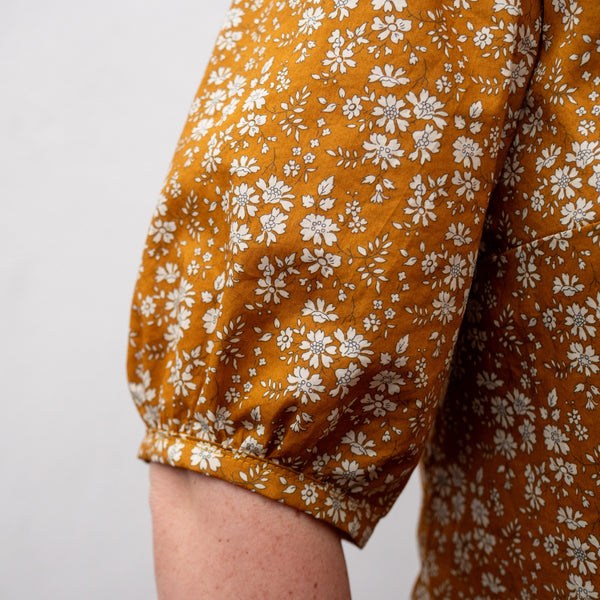
As for how I changed the sleeve, it was quite easy because of the combination of shortening and widening the sleeve cap. I was really worried about doing it the “right” way. I had to remind myself that pattern hacking is about experimentation, not perfection. Since I’m just designing for me, I can embrace it as an art, rather than a science.
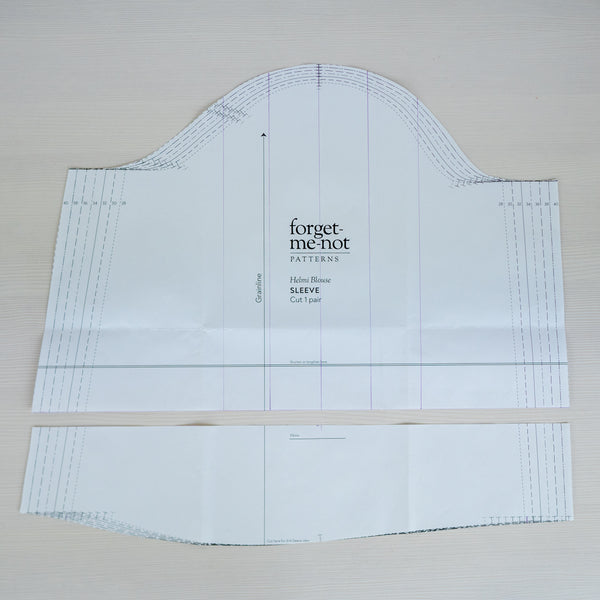
I was initially worried about keeping the sleeve’s hem curve intact, but then I realised that it would change anyway when I applied the “Slash and Spread” method to the sleeve cap. I measured from my shoulder point to the edge of my elbow, which came to just above where elbow is marked on the pattern piece. From that point, I drew a sraight line perpendicular to the grainline and cut there to shorten the sleeve.
The “Slash and Spread” method to widen the sleeve cap is exactly what it says - slashing the pattern and spreading it out! I drew some lines within the sleeve cap parallel to the grainline down to, but not through, the hem edge. I chose to make the hem edges hinge points, because the pattern is already made to add gathering at the hem, so I didn’t need to add any width there.
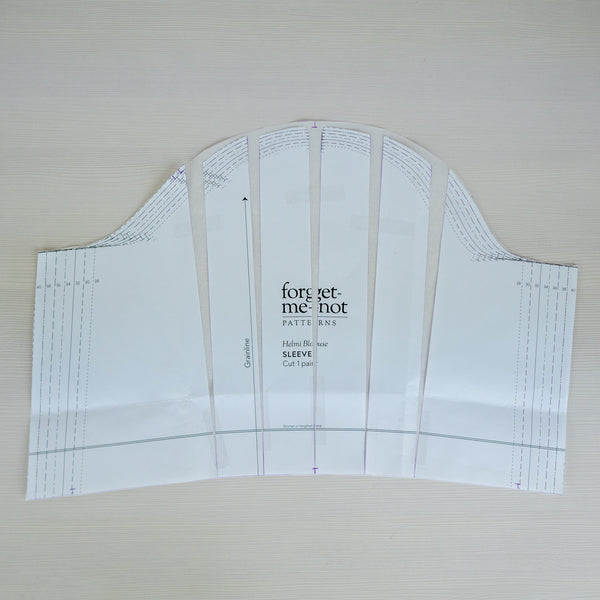
With some blank pattern paper underneath, I spread the piece out and taped down the cut pieces semi-evenly. The principle here is the further the spread, the bigger the poof. I knew I wanted just enough of a poof for some visual interest at the shoulder, but not so much that I wouldn't be able to fit a cardigan over the sleeve. From there, I traced the general shape of my new piece, transferred the notches and I was ready to cut into my fabric.
I also added a little bit of width to the sleeve binding piece. I didn't make a new pattern piece, rather I just measured my arm above my elbow, adding a little extra length for seam allowance and ease.
I marked my bodice piece where I wanted to concentrate the gathering - 7 centimetres (2 ¾ inches) on either side of the shoulder seam. Initially I only sewed my basting stitches along the sleeve head where I wanted the gathering, but I ended up having to remove them. Evidently my sleeve pieces had stretched on the bias, and I was struggling to match the curves of the armscye and sleeve. I added new basting stitches along the whole sleeve piece, which allowed me to ease it into those trickier curves and still have my gathering at the shoulder. It was a tiny setback, but a pretty easy remedy.

Other than my little sleeve ease snafu, the sewing process was such a delight. The instructions are so clear and detailed, holding my hand the whole way through. Plus, my fabric was a dream to sew up. I’m not exaggerating when I say that every seam was a joy to sew and press.
I sewed the shoulder and side seams using French seams, per the pattern suggestion. Everything from the collar, down to the sleeve binding is so neatly finished. I even took the time to do a covered button for the neckline closure - it’s tucked under the collar where no one else can see it, but I love knowing it’s there. It really feels like an heirloom garment - something that I’ll enjoy for years to come and eventually pass down for someone else to cherish in the future.
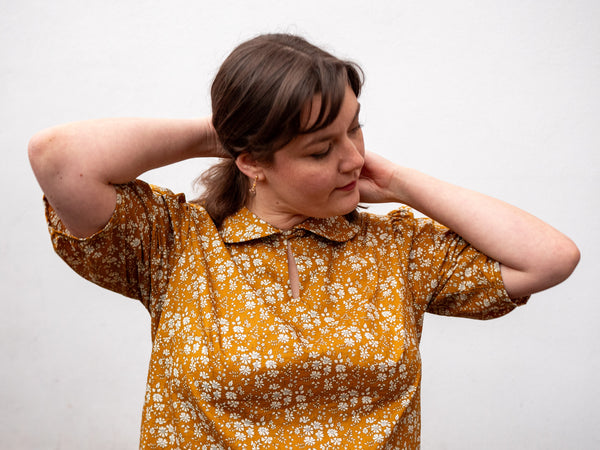
This Helmi blouse represents everything I love about making my own clothing. Between the playfully romantic style lines of the Helmi pattern, the sweet but sturdy print of the cotton lawn and my own handiwork in both changing up the design, then constructing the garment itself, I love this make. It’s beautiful, but holds a deeper meaning for me too.
It reminds me that I’m also playful and romantic! Sweet but sturdy. That I can be creative, flexible and follow through on a vision. What an empowering affirmation! And one that I can think of whenever I wear this blouse - which, spoiler alert, will be all the time!
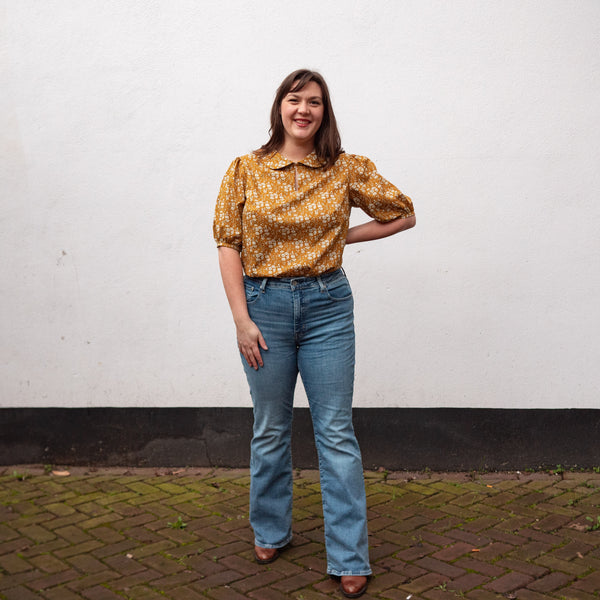
Thanks so much for joining me on this sewing journey. I hope you’re feeling inspired to add your own personal touch to your favourite pattern, or to try out the Helmi blouse soon. Thanks so much for reading and happy making!
You can grab your copy of the Helmi blouse pattern in our store here!
November 05, 2025 0 Comments
It wouldn’t be a Forget-me-not celebration without showcasing the amazing makers who brought our designs to life. Today, we’ll share more about who really made it all possible - you!
October 31, 2025 0 Comments
Fancy a stroll down memory lane? Forget-me-not is saying farewell (at least, for now), but before we go, it’s time to celebrate where we’ve been!
Forget-me-not Patterns launched July 3, 2019 with the Clementine Knit Dress pattern. It was clear from the beginning that the sewing community was eager for distinctly detailed patterns with lots of options for styling and fit. We set out to design wearable wardrobe staples with extra special details to create pieces that were both elevated and easy to wear.
October 22, 2025 0 Comments
Dear Sewists,
With a grateful, yet heavy heart, Forget-me-not Patterns is saying farewell. At least for now. Design and patternmaking mean absolutely everything to me, and this decision hasn’t been an easy one.
